Showing posts with label recycle reduce reuse. Show all posts

Tuesday, January 31, 2012

Tips and tricks: Silicone baking cups


We came up with this trick since we have an ice maker and no ice cube trays. It actually works great and you can freeze in the perfect amount, about a 1/4 cup. Just fill silicone baking cups with desired amount and freeze. Then pop them out and into a freezer bag. We use it for yogurt for smoothies, juices for smoothies, chicken and veggie stock, and pesto.

What else would it work well for? See the commets for more ideas.

Wednesday, January 25, 2012

How to make laundry detergent


I found this recipe via Pinterest (click to find me on pin) from icanteachmychild.com, who got it from the Duggar family's site.

Ingredients:
1/2 cup Borax
1 cup Arm & Hammer Super washing soda (not baking soda)
1 Fels Naptha soap bar, grated (I thought this was going to be really hard to grate but it was easy because the soap is soft)
5 gallon bucket with lid (or something to cover it with)
5 one gallon jugs (old milk jugs work great)
Funnel (we had an old one we used for oil)
optional: Essential oil drops for fragrance (I really liked the smell of the Fels Naptha soap so we didn't add any)
optional: paint stirrer drill attachment

We found all of it at Walmart and already had the 5 gallon bucket. We have been saving milk jugs to reuse. Check out the icanteachmychild.com website for more info on the price. The second time you make it, it is even cheaper because you only need to buy the Fels Naptha soap. Also you can use the borax and super washing soda to make your own dish washer detergent (I will write a post about this too).

Here is how to make it:

Start by grating the Fels Naptha soap. Like I said, I thought this would be hard but it was actually easier then grating cheese. Place grated soap into a pot with 4 cups of water. Stir continuously over medium low heat until all the soap has melted. It took about 10 minutes.

Fill the 5 gallon bucket half way with hot water. Pour in the soap mixture and stir it up. Then add 1/2 cup borax and 1 cup Arm & Hammer Super Washing Soda and stir. The website said to use a paint stirrer attachment for a drill, but we didn't have one so we just used a spoon and it worked great..

Then fill the balance to reach a total of 5 gallons. Stir, cover and let sit over night and it will thicken up. Then mix it, this is were a paint stirrer drill attachment would be really helpful. It got really chunky and mixing with a spoon was hard. The recipe tells you to fill the 1 gallon jugs half with the detergent and half with water.

We decided to keep it in concentrated form to store it, but you still want to put it into 1 gallon jugs so the concentration does not get messed up. Then mix half water/half detergent to keep in the house. We also are going to use the concentrated version in a small bottle to see if we can use it as a stain remover.

The recipe says to use: (shake the container first)
1/4 cup for a front loading (he) machine
5/8 cup regular top loading machine

We tested it on a load that included my husbands work out clothes, along with other stuff...my toddler is in the middle of potty training...hint hint. The clothes came out smelling clean...so it works! I did use a little more then recommended because we used the extra large load setting. We found it helpful you use an old laundry detergent bottle for storage inside because it has the measurement in the cap. Stay tuned by following our blog for more how to and homemade recipes.

Sunday, January 8, 2012

Homemade Biodegradable Seed Starters: Updated

Update below.

I found this the other day and thought I should share it. Homemade Biodegradable Seed Starters from Toilet Paper Tubes...what a great idea, right?


All you have to do is cut a toilet paper tube in half (or a paper towel tube in quarters or maybe more) and fill it with potting soil, then use as you would normally use a seed starter. Simple...easy...and best of all, FREE! Thanks goes to NW Edible for the idea! :)

So after trying this...I DO NOT recommend it. Once wet the glue released and created a mess. They fell completely apart. I guess you could put tape around them and then take it off when you transplant but I would just recommend using something else. Sorry if any of you already tried it.

Friday, December 30, 2011

Canned goods total 2011

Spicy pickled green beans with cauliflower

Chicken (turkey) stock

Zucchini pickles

Half gallon jars of CircleFive marinara sauce

We did a lot of canning this year but I hope to can even more next year.

Marinara- 185 pints
Pomegranate sauce- 1 half pint and eight 4 oz jars
Demi glace- twenty two 4 oz jars
Bloodymary mix- 6 and a half pints
Zucchini pickles- 8 pints
Spicy pickled green beans with cauliflower- 7 quarts
Chicken and turkey stock- 50 pints ish...I didn't keep a log in the beginning of the year.

Stay tuned for our next years goals...
and have a Happy New Year!

Wednesday, December 14, 2011

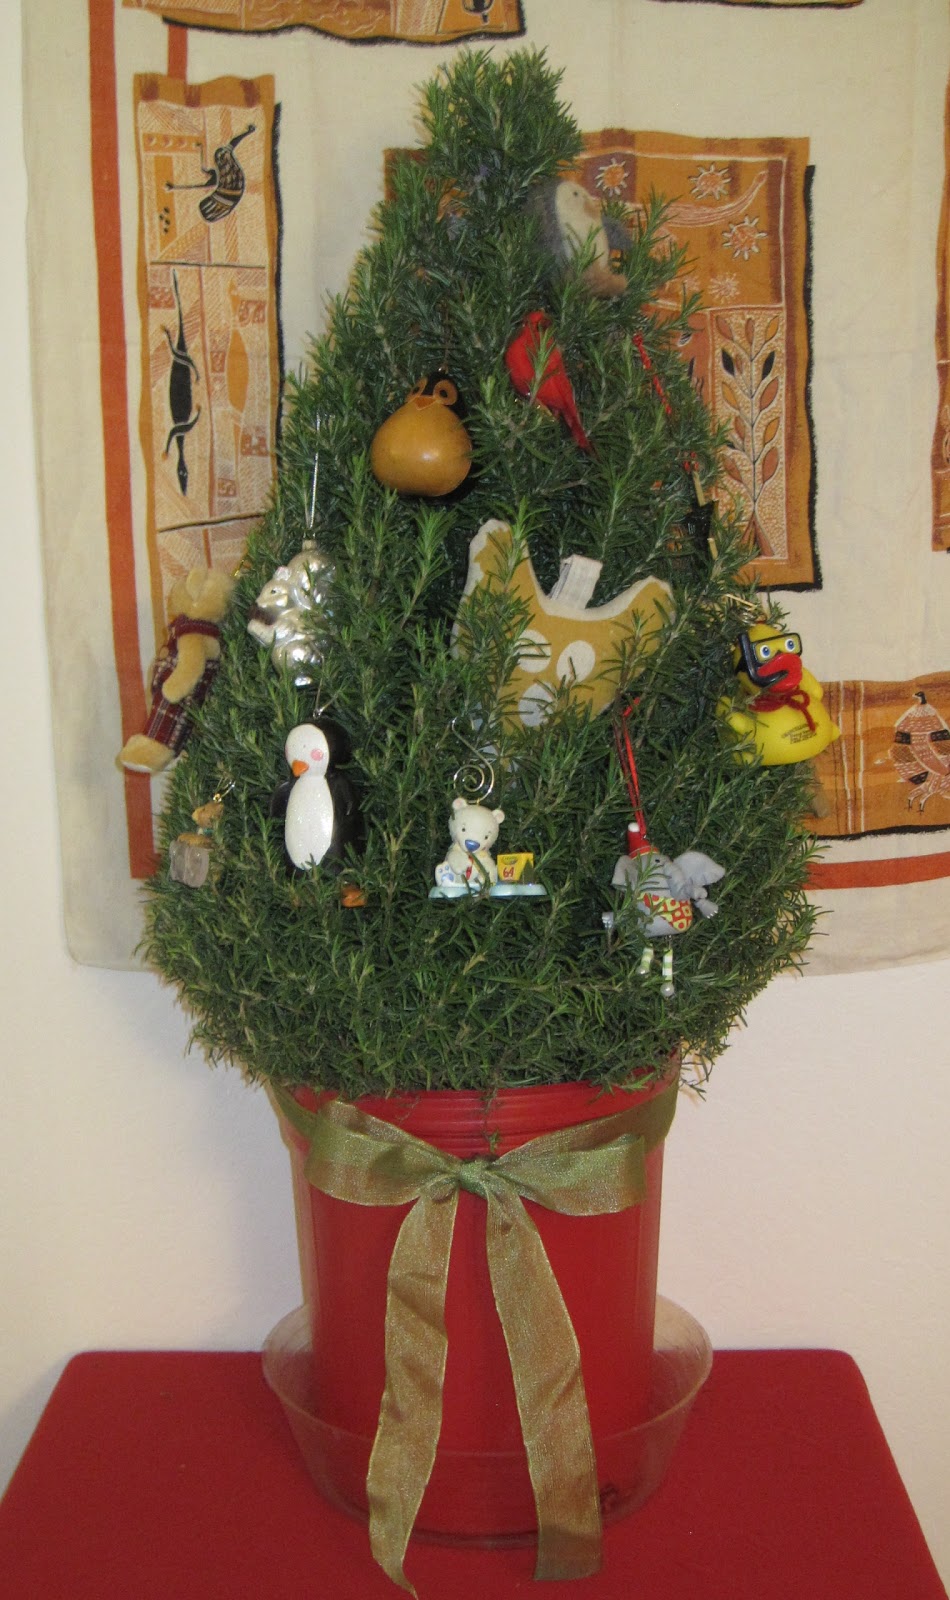
Our Chirstmas Tree

This years Christmas tree, a rosemary plant.

Last years Christmas tree

Last year we decided on getting a little rosemary tree as our Christmas tree. I wanted something to make the house smell of Christmas and wanted the little guy to have the fun of decorating. We always spend Christmas out of town so it doesn't make a lot of since to get a big tree. We love this idea because you get to plant a tree instead of cut one down! Plus you will always have rosemary. We get an ornament every year to add to our collection and this year we got a chicken.

Friday, December 9, 2011

A great gift idea for anyone...a chicobag!

Sorry we have been a bit absent on the blog, we have been very busy creating our home made Christmas present that we make every year for family. I finally finished two of the big projects and now I will have time to write about them and all the other stuff I have been waiting to write about...
I use the messenger style as my purse!

The messenger style is really the perfect mom purse. It has a hook for you keys right at the height to unlock any door with a kid on your hip. It has two side pockets, I use one for my sunglasses and the other to store two vita chicobags. It has one small pocket on the inside (its what you fold it up into), which I use for my cell phone. It has a large outside pocket that zips that is perfect for wallet, chap stick, and receipts. Then there is the big, huge pocket that can fit all the kid stuff you need! Diaper, wipes, books, snacks, extra clothes, toys, another Sweet Repeats chicobag...the list goes on and on. Hey and guess what its made of recycled materials and folds into a little pouch if need be!

I also really love the new Vita's, mostly because you can fit so much in them and they actually stay on your shoulder but also for all the other awesome reasons I love Chicobags. One thing I don't like is trying to use self check out with them...you have to set all your stuff to be weighed and then bag it after. I feel like the stores should be able to fix this problem pretty easily...its all about weight so just let me weigh my bags prior and then I could bag right into them. Some day I'm sure they will fix it! :)

PS: They make great gift wrap!
Chicobag.com

Saturday, November 19, 2011

I love my lil' South (a chicken)

Just pulled South's (our chicken we never thought would make it when she was a chick) second egg of the day...I love her so much! Yes she can be a brat but I can't help but love her...I guess I really am a momma!

This is a pic of her nesting area...no one else is allowed. I am now starting to think that maybe she is in charge, head of the pecking order. As you can see it is under the nesting box. :)

My favorite, South. A pretty tight fit...but I guess that's the way she likes it.

Oh and here is the new style nesting box with West in it. All our girls, except South are laying in it now. As you can see it is an old tub with the front cut out.

We are planning a chicken share., you commit to 1-2 chickens and receive said amt of eggs each week. Let us know if you are interested and close to where we live? One chicken would be about 6 eggs a week

We can start girls in Feb, which means 6-7 months til eggs but we almost always have extra eggs from our current girls. The eggs are so much better...its amazing.

Tuesday, October 18, 2011

A green alternative to store bought sponges...Knit a reusable one!

I recently realized how wasteful I was when it came to sponges. They get dirty so fast and there is really no way to sanitize them. So what to do? Stop washing dishes...no! It relaxes me...one thing I actually enjoy doing...I know I'm weird. I decided that I would knit something to replace them, it was really simple.

Basically knit (or crochet) a square double the size of a regular sponge, then fold in half and sew shut...your done! I used cotton yarn so that I could just throw it in the washer and dryer. It doesn't dry out very well so I recommend making at least three depending on how often you do laundry. I also made one in a different color for the bathroom, this way I will never get confused. I'm somewhat of a germ freak when it comes to certain things, toilets being one of them.

I have been using these for the past 6 months and they have been working great!


Thursday, October 13, 2011

Root Simple: Quick and Easy Fire Starters

We made these last week with things we had around the house.

Root Simple: Quick and Easy Fire Starters: "I came across these fire starters this week while sorting out our camping gear, and thought I should blog about them..."

I suck at starting fires...the doctor is always in charge of the fire but using fire starters makes it pretty easy to start a fire. So when I found these on one of the blogs we follow, we figured we might as well try them. Wow, they work really well! He decided we needed to used 6 to start a fire. Of course you really only need one or two.

You really only need a paper egg carton, dryer lint, and an old candle. So much cheaper than buying fire starters at the store. I also feel like they are probably better for the environment. They were so easy to make and use. These would be great for campers and fires at home.


Thank you to root simple for the info!

Tuesday, August 2, 2011

How to turn an old shed into a chicken coop

Please note this blog is no longer updated. (Click here to find my new blog address).


We tried to buy as little as possible and use things we already had to build most of it. Our landlord told us he wanted to tear down the shed, and we asked him not to so we could turn it into a chicken coop. We found old tree branches and screwed them together to make the roost for them to sleep on, and every morning before they depart you can find them all on our make-shift roost.


Here is the outside caged area for them to run around in during the day, we will need to put them in at night to protect them from raccoons and sort. We kept it simple using old scrap 2X2s and posts to build somewhat of a cage. Then we covered the bottom half with poultry netting and the rest with deer netting, using staples and zip ties to keep it together. The girls did manage to get out of this part when they were still pretty small, so we placed old chunks of concrete and old pipes around the base to keep them from finding their way out.


This last part is the ramp/door combo we made for them. We just cut a large rectangle out of the side of the shed and attached it with a hinge and lock. This way we can pull them in at night and they have a ramp to get in and out.


We used these tubs for our garden last year and we had to drill holes in them to let water escape so they will be perfect as nesting boxes for the girls. Our neighbor grew nest egg gourds this year and kindly gave us a few as decoys for the girls to get the idea of where to lay their eggs.


We also cut holes up near the top of the shed and placed netting over them for plenty of ventilation. Chickens make a lot of moisture...I cannot stress enough how much moisture they make. So we attached a large fan near the top to create even more ventilation for them. The next project will be keeping them warm; something we'll worry about come fall.

How to build a chicken brooder

Please note this blog is no longer updated. (Click here to find my new blog address).
 
 
We tried to buy as little as possible and use things we already had to build most of it. We started with a large rubber-made tub for our brooder. To give it ample ventilation we drilled a series of holes in the sides (not pictured). We attached a wooden bar across the top, using zip ties to create handle and place to rest the cardboard to keep them from flying out. The last step is to place pine shavings in the tub and attach a heat lamp to the wooden handle. Then add a feeder and water for them.

Our girls took 10 weeks before it was warm enough outside, and we kept them in this tub the entire time without any problems at all. We did let them play in the yard at least every day, they absolutely loved it, and so did Gnar.


Thursday, July 14, 2011

Dryer balls

Please note this blog is no longer updated. (Click here to find my new blog address).


A friend of mine from the moms group I am in, just started a work from home business making felt food and dryer balls. I had never heard of dryer balls, oh my goodness what a great thing they are. Here is some info on how they work. Please check out her website Shayna's Treats for more information and order yourself a set.

Why use dryer balls?

Using 4-8 dryer balls can save you from 20% to 40% (depending on the size of the load and what kind of fabric is in there) on your drying time!

Dryer balls replace expensive dryer sheets and fabric softener and help to get your clothing soft and static free without the chemicals!

Our dryer balls are made of 100% wool, a natural alternative to plastic balls, they make less noise, work better, and last longer!


How do they work?

The dryer balls bounce around in the dryer with your clothing, lifting and separating them and allowing the air to circulate much more efficiently. They also absorb some of the water, and the gentle friction of the wool against the fabric softens and gets rid of static electricity.

I personally have a sensitivity to wool products so I am working on making myself a set that are cotton. When I have it worked out I'll share so those of you who are wool sensitive or allergic have an option to take advantage of this cool product!

Thursday, June 23, 2011

How to make an old t-shirt into a reusable bag

Please note this blog is no longer updated. (Click here to find my new blog address).


I got this great idea from a fellow blogger, The blue spot! Check out the link for a video. I used a new t-shirt that the Doctor got me as a joke gift and I have never worn. I kept meaning to turn this shirt into a bag but always put it off, then I read her blog post and got inspired!

What you need:
T-shirt
Scissors
needle
thread
a mixing bowl
a pen or pencil

Its really very simple, start by sewing the bottom of the shirt closed. I turned it inside out first and since I don't have a sewing machine, I switched across twice.


Lay the shirt flat, and smooth it out well. Then using the mixing bowl trace around the neck to create a larger opening and cut off the sleeves.


Voila, its done! I'm planning on trying to work on using the sleeves to create a pocket. Think how many you could make and just put in your car...you would never have to use a plastic bag again!

Friday, May 6, 2011

How to make one whole chicken into over 6 meals.

Please note this blog is no longer updated. (Click here to find my new blog address).
 
 
First, off start by cooking a whole chicken. We usually take out the giblets and rinse everything. Then place it all in a roasting pan with a few potatoes, carrots, an onion cut in half and a head of garlic cut in half. We stuff a few tablespoons of butter under the breast skin, and again baste the skin with butter. Its a good idea to season the skin after basting, we use salt and pepper, but the addition of lemon thyme or sage is great. We also pour water or chicken stock into the cavity to make it more moist. Now you seal the top with tin foil, make it a nice seal around the baking dish, it really helps keep the bird moist. We usually bake it at 350 degrees for 1.5 to 2 hours covered, and then another 15 minutes on broil. Finally, it's time for dinner (this is the first meal). Then the next two nights (meals two and three) we either re-heat it in the oven and have the same thing or cut pieces off to add to other meals.


The next morning we pick off all the rest of the meat and seperate it into meal sized portions in freezer bags. This time I only got three bags (meals four, five, and six). You can skip this step and just move forward to the next if you think its gross. It is gross to pick a chicken but I usually use gloves and I've become used to doing it.


Then you add your mirepoix to a large pot. A mirepoix is a combination of onions, carrots, and celery, I also add three or four bay leaves and ten to twelve whole black pepper kernels. It doesn't need to be chopped perfectly, I just break the celery ribs to fit into the pot along with the carrots (I only had baby carrots on hand this morning, so I used them instead of whole) and cut off the ends of the onion. You are now making chicken stock. :)


Add in the chicken carcass, juices and any other left overs from the roasting pan. Then cover with water and bring to a boil. I really like using my pasta pot to make stock because when your done you can just pull all of the bones, veggies, etc. up and out instead of trying to use a strainer.

Once boiling reduce to a simmer for at least 4-5 hours. I usually cook it all day, the longer it cooks the more rich and healthy it will be. Once it has finished cooking, strain out bones, veggies, etc., cover and place in the fridge over night. In the morning scrap off all fat and taste. I sometimes have to reduce it down even more for a richer stock, which usually means about 2 or more hours of simmering.


We then pressure can or freeze the stock and use it to make more meals, almost every time we make rice we use chicken stock instead of water to cook it in. Voila! You have made one chicken into over 6 healthy home-made meals, now sit back and put your feet up...you deserve it!

Thursday, March 31, 2011

Save the bees! Build a bee box!

Please note this blog is no longer updated. (Click here to find my new blog address).
 
 
The Doctor and I learned how important bees are in the garden last year, so this year we are doing everything we can to help bring bees to us, along with helping them and the enviroment out. We have a pool in our backyard and we are always trying to safe stuck bees. This little guy didn't make it sadly.


We decided this year to build three different types of bee nesting boxes and find out which works best. This is the first one we made and it is the easiest to make. Find any piece of wood and drill lots of 1/2-3/4 inch holes about 3-4 inches deep, making sure not to go all the way through, and hang it. Pretty simple, easy and cheap. I don't know how well this one will work but I will post the other two we build once they are finished.


We also decided to plant as many flowers all over our yard and in the garden to attract bees. We are planning on planting over 14 different flowers this year. I picked out mostly perinnals so I won't have to plant them again next year. For more info about bees please check out this link on Sunset Magazine: give bees chance

Friday, September 10, 2010

Food adventure

Please note this blog is no longer updated. (Click here to find my new blog address).


The Doctor and I started a new adventure by trying to make everything we can from scratch and using a pressure canner to cut costs and time. Just thought I'd post some pics of some of the stuff we have been working on. We have been working on creating the perfect marinara sauce together for about three years now. We have the ingredients down but over the next few summers we will be working on deciding what types of tomatoes will be the perfect combo. Here are some pics of food and our weird front yard garden this year (with no sun in back we had to move it out on our driveway).
Related Posts Plugin for WordPress, Blogger...